Amazon WS EC2 – connect via SSH RSA
15 Sep 2013Intro
So you own an up and running Amazon EC2 instance. And you want it to access via hassle free way. This guided post will describe on how you can do it with few steps.
Note: Just for the convenience I’m referring some steps from this blog here
OK before I start assume you have an up and running EC2 instance. If so grab the public DNS from your AWS management console
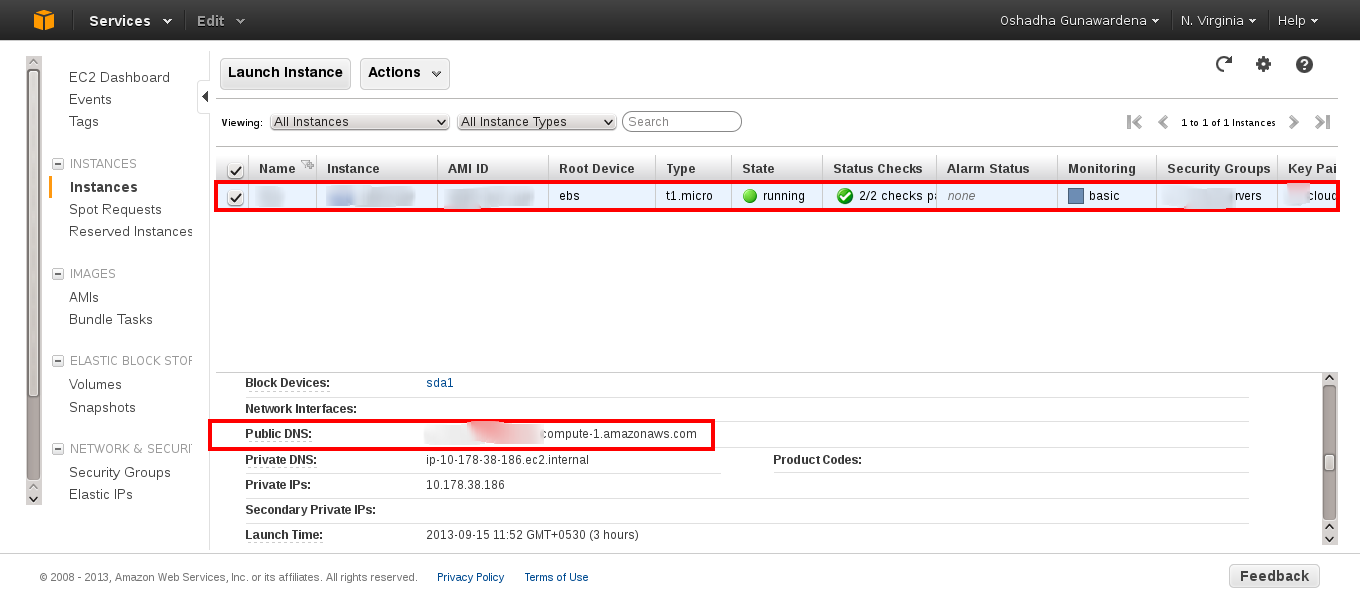
It will be probably something like
ec2-#############.compute-1.amazonaws.com
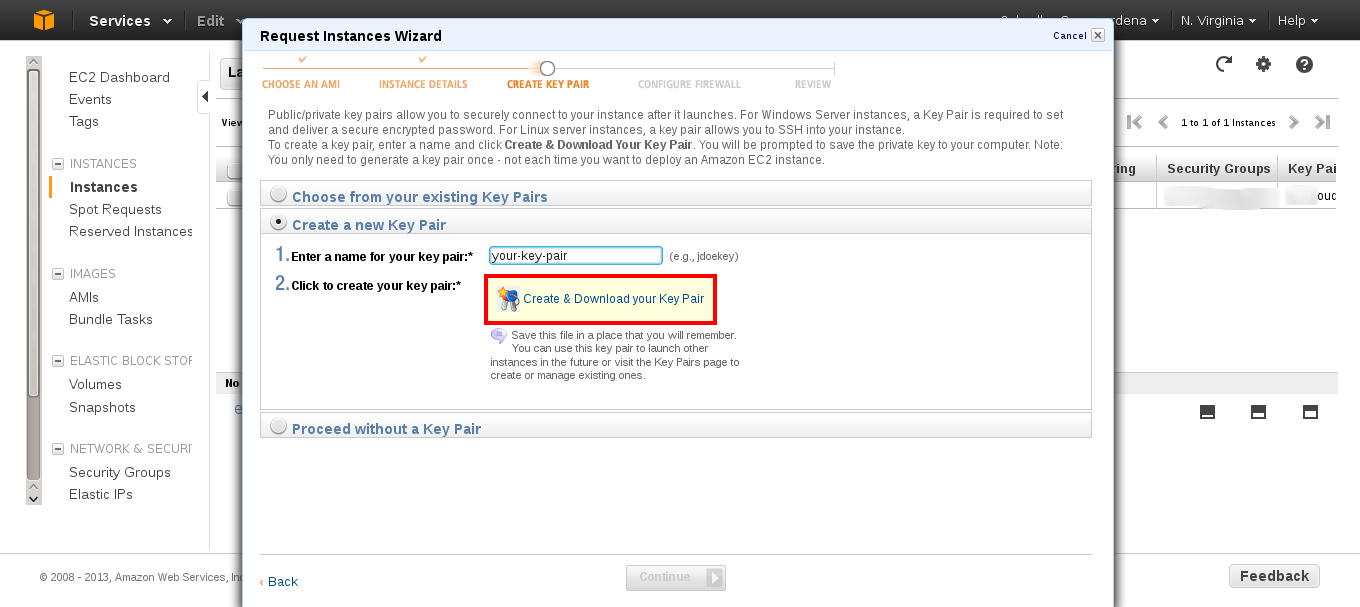
Once that is acquired I again assume you have already made your Key-pair and saved it while you are in the process of creating a new instance
Once that is also in place go to your terminal and CD to the location you saved your Key [your-key-pair.pem] and try to do SSH.
$ ssh -i your-key-pair.pem ubuntu@ec2-#############.compute-1.amazonaws.com
[the default user will be ubuntu for Amazon Machine Images (AMIs)]
Now you should be inside the AMS terminal
Ok now you have to do is add your self up as a new user and give the root privileges (sudoers). Simply follow execute the following commands on to the AWS terminal
Adding yourself as a user:
$ adduser yourself
granting privileges
$ sudo visudo
find the line root ALL=(ALL:ALL) ALL and the line yourself ALL=(ALL) ALL under it.
Then enable password authentication via (I used the nano editor)
$ sudo nano /etc/ssh/sshd_config
PasswordAuthentication no to PasswordAuthentication yes
Afterward reload the ssh configuration
$ sudo /etc/init.d/ssh reload
OK now logout from the current session and log back as yourself
$ ssh yourself@ec2-#############.compute-1.amazonaws.com
And to make sure everything is working just fine, execute following
$ sudo -v
You will be promted to enter the password you have provided while creating the user(yourself). Enter that and if everything went well you will get no output on terminal.
Now lets remove this troublesome password authentication replacing SSH RSA public key authentication
To do that first you need to create a SSH RSA public key
So logout from the AWS terminal and from your local terminal execute the following command (Just press return for all the steps)
local-host$ ssh-keygen -t rsa
And you will be promted as below
Enter file in which to save the key (/home/yourself/.ssh/id_rsa):
Created directory ‘/home/yourself/.ssh’.
Enter passphrase (empty for no passphrase):
Enter same passphrase again:
Your identification has been saved in /home/yourself/.ssh/id_rsa.
Your public key has been saved in /home/yourself/.ssh/id_rsa.pub.
The key fingerprint is:
58:3a:80:a5:df:17:b0:af:4f:90:07:c5:3c:01:50:c2 yourself@inux-cc6a
Your public key will be stored in /home/yourself/.ssh/
Now what you have to do is add that key to AWS in order to identify yourself as authorize user.
local-host$ scp ~/.ssh/id_rsa.pub yourself@ec2-#############..compute-1.amazonaws.com:/home/yourself
Then again login to the AWS
local-host$ ssh yourself@ec2-#############..compute-1.amazonaws.com:/home/yourself
And place the key file in right place
$ mkdir .ssh
$ mv id_rsa.pub .ssh/authorized_keys
$ chmod 700 .ssh
$ chmod 600 .ssh/authorized_keys
Now you should be able to login without using a password
local-host$ ssh yourself@ec2-#############.compute-1.amazonaws.com
Finally remove the password authentication and root user access
$ sudo vim /etc/ssh/sshd_config
Find the line PasswordAuthentication yes and change it to PasswordAuthentication no
Also PermitRootLogin yes to PermitRootLogin no
Finally reload the SSH configurations again
$ sudo /etc/init.d/ssh reload
That’s all you need for crating a new user account and allowing authentication via SSH RSA.
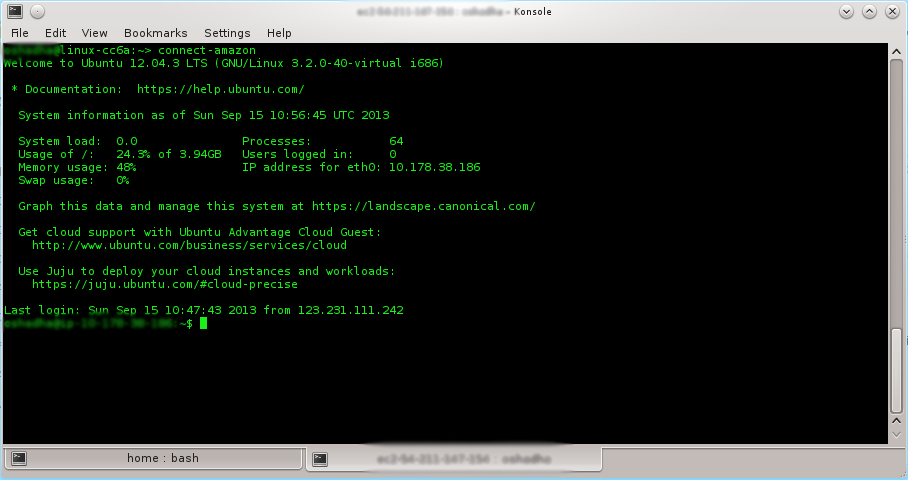
If you are still lazy enough to type that long public DNS you can simply assign it to an alias and place it in the ~/.bash_proflle or ~/.bashrc to make it permanent.
amazon cloud ssh
alias connect-amazon='ssh yourself@ec2-#############..compute-1.amazonaws.com'
$ connect-amazon